Back to: Multiplier Event Luxembourg
Let us break the Python code down into different parts.
Take sensor readings
When button B is pressed, the colour-sensing process starts. To prevent any previously displayed colours from interfering with the sensing of a new colour, all NeoPixels are turned off. Crucially, short sleep times are included between each light action to allow the NeoPixel sufficient time to react. Next, the NeoPixel #1 is turned on in red, and a sensor reading is taken and stored. This process is repeated for green and blue, with NeoPixel #1 being turned on in green and then in blue.
    # If button B is pressed, the color will be detected.
    if cp.button_b:
        # Make sure that all NeoPixels are turned off.
        cp.pixels.fill((0, 0, 0))
        time.sleep(0.1)

        # Get red value.
        cp.pixels[1] = (255, 0, 0)
        red = cp.light
        cp.pixels.fill((0, 0, 0))
        time.sleep(0.1)

        # Get green value.
        cp.pixels[1] = (0, 255, 0)
        green = cp.light
        cp.pixels.fill((0, 0, 0))
        time.sleep(0.1)

        # Get blue value.
        cp.pixels[1] = (0, 0, 255)
        blue = cp.light
        cp.pixels.fill((0, 0, 0))
        time.sleep(0.1)
Calculate the colours
First, the lowest and highest light readings are determined and stored as the minimum and maximum detected light levels, defining the range for the raw light input. The detected light level range is then remapped to a scale of 0 to 255, making it suitable for use as an output value for the NeoPixels. Although NeoPixels cannot perfectly match the colours the human eye perceives, the replicated colours often produce a more satisfying and visually appealing result. To further simplify the colour reading process, any RGB value below 30 is removed. This adjustment helps accurately display the true primary colours of light, i.e., red, green, and blue since some residual colour is usually detected.
        # Determine the lowest and highest light readings.
        minimum = min(red, green, blue)
        maximum = max(red, green, blue)

        # Map light from between minimum and maximum reading to 0-255.
        red   = int(map_range(red,   minimum, maximum, 0, 255))
        green = int(map_range(green, minimum, maximum, 0, 255))
        blue  = int(map_range(blue,  minimum, maximum, 0, 255))

        # Reduce the range of detected colors.
        if red < 30:
            red = 0
        if green < 30:
            green = 0
        if blue < 30:
            blue = 0
Output the result
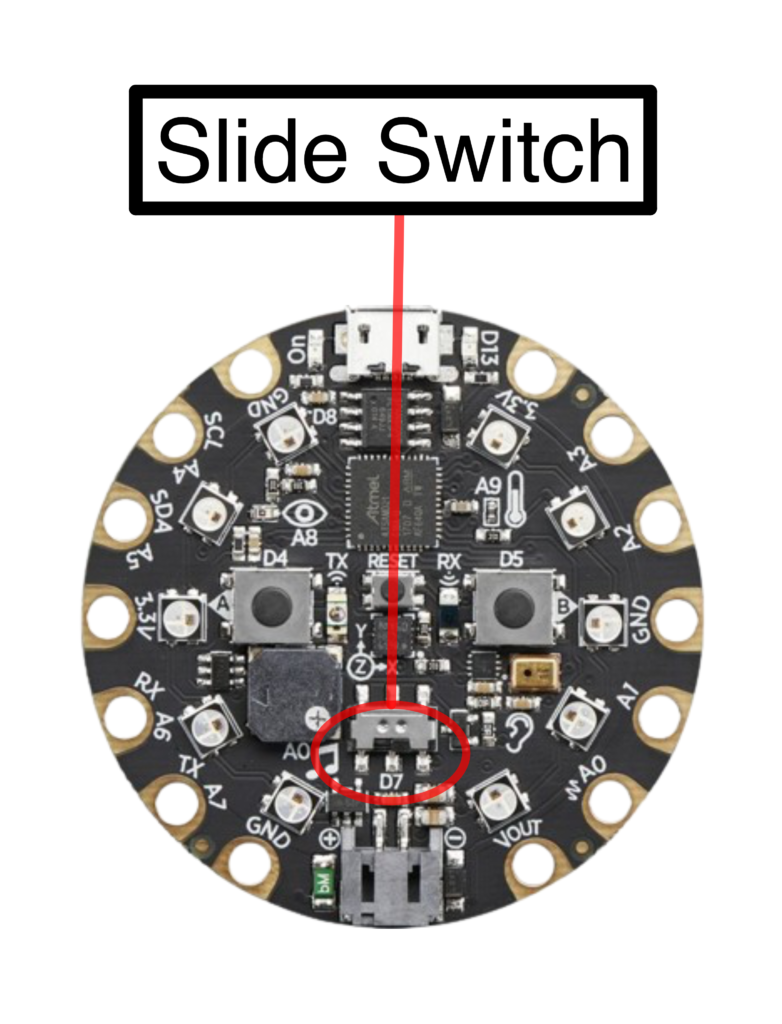
Depending on the slide switch, the Circuit Playground Express board will print the readings to
- the serial console if the switch is towards the left or
- the CircuitPython storage if the switch is towards the right.
Finally, there is some logic to determine whether the reading was good. If the difference between the minimum and maximum readings is too small, it likely indicates nothing was held above the colour sensor. In the case of a bad reading, the lights will remain off. If the colour sensing is successful, all NeoPixels will be set to the detected colour, and the RGB value will be printed.
When the Mu editor’s CircuitPython Plotter is activated, you can observe a colour’s RGB components – red (shown as orange), green, and blue – displayed on the plotter. Instead of red, green, and blue, the colours are printed as blue, green, and red to match the lines on the plotter with the colours they represent. The Mu editor’s CircuitPython Plotter can be activated by clicking the Plotter button at the top.
        # Depending on the switch, write to
        # * the serial console (if True, i.e. left), or to
        # * the CircuitPython storage (if False, i.e. right).
        if cp.switch:
            # Distinguish between a good reading and a bad reading.
            if maximum - minimum <= 30:
                cp.pixels.fill((0, 0, 0))
            else:
                cp.pixels.fill((red, green, blue))
                print( "Output RGB is (", red, ",", green, ",", blue, ")")
                # Print the red, green and blue values to match the color lines on the Mu plotter.
                # The orange line represents red.
                print( (blue, green, red) )
        else:
            f = open("rgb.csv", "a")
            f.write(repr(red) + "," + repr(green) + "," + repr(blue) + "\n")
            f.close()
You can achieve greater accuracy by using a dedicated IR colour sensor. However, using a light sensor combined with a NeoPixel can also provide useful results for this type of application; you may need to take multiple readings to achieve the most accurate colour.